Lead Climbing Basics: What Is It and How to Do It (2024)

The more experience you get with rope climbing, the more likely you are to begin lead climbing. Lead climbing is the bread and butter of rock climbing. As such, it is a skill that most rock climbers are motivated to learn.
But take it from us – you don’t have to rush into leading climbing. Take your time and get started with lead climbing in a methodical manner.
This article is the perfect place to start. Below you will learn the basics of lead climbing–what it is and how to do it.
What is Lead Climbing?
“How do you get the rope up there?” is a question we hear all the time. And the answer is– lead climbing.
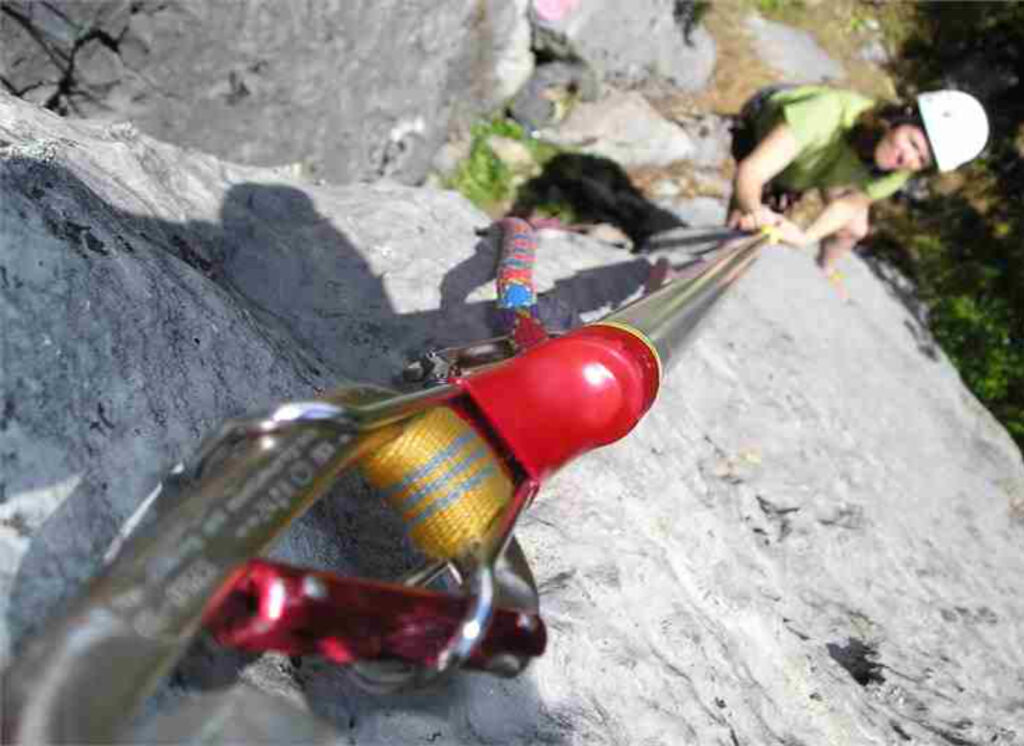
With lead climbing, a climber leaves the ground bringing the rope with them. The rope is secured to the belay loop of their harness with a tie-in knot and runs directly down to the belayer’s belay device.
As the climber advances upward “on lead,” they clip into bolts secured permanently to the wall or removable pieces of trad climbing gear. Once they reach the top, they clip their rope into fixed anchors and lower off the climb.

Safety Considerations for Lead Climbing
Lead climbing is an extremely fun style of free climbing. However, lead climber puts themselves at risk every time they tie into “the sharp end.”
In a 1988 study in Yosemite National Park (1) that reviewed 220 climbers who got injured, 65% of them were injured in lead falls.
Therefore, it takes constant awareness of risk and risk mitigation to make it as safe as possible.
The Holy Trinity of Lead Climbing Safety
Rope Awareness
Being aware of where your climbing rope is in relation to your body, specifically your feet and legs, and the rock is critical.
You generally want to keep your lead line between your legs and in front of your feet. You always want to avoid stepping in front of the rope and letting the rope drag behind your calves and heels.

The reason is that if the end of the rope is caught behind your legs in the moment of a fall, it will flip you upside down. Flipping upside down as you fall will expose your butt, back, and head to impact the climbing wall.
Proper rope awareness takes contact vigilance and climbing discipline on behalf of the climber and belayer. In time, maintaining your rope in a safe position in relation to your feet and legs will become second nature.
You also want to be aware of where your rope is in relation to the rock face. You want to monitor the rope as you climb and ensure that it remains unstuck from cracks, sharp edges, horns, climbing holds, other rock features, and the bolt hangers themselves.

Back-Clipping
When you learn to clip a quickdraw, the first thing you want to focus on is never back-clipping. Back-clipping is when you clip the rope into the quickdraw.
When you start climbing, you want to avoid back-clipping because it exposes you to more risk. With a black-clipped quickdraw, it’s possible, although rare, for your rope to unclip itself as you fall.
When you clip quickdraws backward, your rope goes from your harness into the front of the quickdraw and out the back towards the wall. This is incorrect.
Instead, you want to clip the rope so that the rope comes from the back of the quickdraw to the front and then down to your harness.

Z-Clipping
To mitigates risk as a lead climber, you also want to avoid z-clipping.
Z-clipping is when you take the rope from below your most recent quickdraw and clip it into the next quickdraw. When you do this, the rope roughly forms the shape of the letter Z. This is incorrect.
When a lead climber z-clips, they expose themselves to a larger fall distance. This is because although they’ve clipped a higher quickdraw, their rope is still only coming from the lower of the two quickdraws. So if they fall while z-clipped, they will fall past the upper quickdraw and be caught on the lower one.
Instead, every time you clip, you must take the rope from above the most recent quickdraw and clip it into the next quickdraw.
Rope Stretch and Physics of a Falling Climber
Lead climbing is inherently more risky than top-rope climbing. The main reason is that when a lead climber falls, they take bigger falls.
Lead climbers take bigger falls because they climb above their protection For example, if they are five feet above their last quickdraw, climbing science and physics tell us that they will fall the five feet to their last quickdraw, plus an additional five feet– creating a minimum 10-foot fall.

However, the fall could be bigger depending on how the belayer catches the climber and how much rope slack they had between them and the climber.
This differs from top-roping because when top-roping, you always have the rope permanently attached to the anchor above you. Therefore, when a climber falls while top-roping, they typically only fall as far as the rope stretches.
Therefore, to lead climb safely and avoid massive falls, aka whippers, and potentially a ground fall, the belayer must pay attention and practice safe belaying at all times.
Climbing With a Helmet
We recommend climbing with a helmet if you plan to lead outdoors.
Helmets protect you (and your belayer) in two crucial and potentially life-saving ways.
- In the event of a bad fall where the lead climber flips upside down, a helmet can prevent and, at the very least, mitigate severe head injury.
- Climbing outdoors comes with inherent risks. One of the most dangerous and unpredictable risks is falling overhead hazards, such as rock falls and dropped equipment. A helmet can act like a barrier and protect your head in the event of falling hazards.
Stick Clipping the First Quickdraw on a Sport Route
To make sport climbing safer and to avoid ground falls, we recommend stick-clipping the first quickdraw. And sometimes even the second, depending on the climb.
Stick-clipping is a technique where you use a special tool called a stick-clip to clip the first quickdraw from the ground.
To stick-clip properly, you must attach a quickdraw to the stick-clip and pre-load the rope into the lower carabiner of the quickdraw– remembering to avoid back-clipping.
Give yourself enough slack in the rope, raise the stick-clip and then clip your quickdraw into the first bolt of the climb.
Important Techniques to Learn

Spotting Your Climber
Before a lead climber clips their rope into the first piece of protection, either a bolt or piece of trad gear, they risk a ground fall.
That is why it is good practice as the layer to spot the leader until they clip into the first quickdraw. Then, you can begin belaying them like normal.
Spotting is especially important for outdoor climbs where the fall zone is uneven or insecure.
Clipping Quickdraws
Whether you plan to clip bolts on a sport climb or go trad climbing, efficiently clipping quickdraws to protect yourself is an essential skill.
The more practice you get clipping draws with both hands, in different stances, and with the gate of the carabiner facing different directions, the better.
The end goal should be for clipping to feel like second nature and to occur lightning fast.

Lead Belaying
You cannot lead climb with lead belaying. Learning the art of both skills is indispensable.
However, if we were to recommend prioritizing one over the other, we would recommend spending more time with lead belaying.
Falling
Falling is as much of a skill as leading and belaying. It takes practice to learn how to fall and to become comfortable taking a whipper.
To practice falling, we recommend climbing above your protection and purposely falling in gradual increments. Eventually, you will begin to trust the equipment and your ability to fall safely.
Building Anchors
Depending on the type of rock climbing you enjoy and the anchor set-ups at your local crag (or lack of), it may be necessary to build an anchor.
This is not an anchor-building article. But knowing how to use your own quickdraws or other equipment to create a safe anchor is a vital skill for sport and trad climbing.

Cleaning Anchors
Once a top anchor is built, you have to clean it when you are done climbing the route. Cleaning anchors is the process of safely removing your personal equipment from the route so that you can lower and reuse your equipment next time.
Cleaning anchors is an important skill with heavy consequences– incorrectly cleaning anchors can lead to fatal accidents. We cannot recommend enough the advantage of learning how to clean anchors with two feet on the ground.
Nowadays, many gyms have a practice area where you can fine-tune your cleaning skills before taking them outside onto a real rock route.
Gear

Like other forms of climbing, you need to invest in additional equipment to start lead climbing. The gear you buy for lead climbing may vary depending on if you are climbing indoors or outdoors. But regardless, our list below will be a helpful resource.
- Helmet- helmets are strongly recommended for outdoor sport climbing.
- Harness- a modern, lightweight, and comfortable climbing harness that is permanently double-backed is recommended.
- Locking Carabiners- a selection of locking carabiners is necessary for belaying and building anchors.
- Belay Device- assisted braking belay devices are becoming the norm for modern sport climbing.
- Climbing Shoes- a model that fits your feet well and matches the type of terrain you enjoy climbing makes all the difference.
- Quickdraws (QDs)- a rack of QDs is the bare minimum for sport lead climbing. However, depending on the route, it may be nice to also have extendible quickdraws to reduce rope drag.
- Climbing Rope and Rope Bag- a dynamic rope is a necessity for sport climbing. The rope needs to be long enough for the size of the terrain you climb. A bag is also helpful for transporting your rope and keeping it cleaner.
- Traditional Climbing Gear- if you plan to get into trad climbing, you will need additional equipment like camming devices and stoppers.
- Belay Glasses and Belay Gloves- luxurious (but non-essential) items like belay glasses and gloves keep you more comfortable and increase your belaying longevity.
- Chalk Bag- on longer routes, your hands can become sweaty so chalk helps dry your hands and enhance friction.
Practical Tips to Get Started

Hire a Guide
The best way to learn new climbing skills is under the guidance of a guide. Most professional climbing guides have spent years fine-tuning their instructional techniques. This makes them ideal candidates for teaching you how to lead climb safely.
When you hire a guide, they will walk you step by step through the process of becoming a lead climber– everything from basic climbing techniques to clipping, falling, and belaying.
Get Experience with Top Roping
To prepare yourself for lead climbing, one of the easiest things you can do is spend time on top-roping and building strength.
Copious top-rope laps are the perfect way to build your strength and endurance. This will pay off when you eventually switch to lead climbing.
In general, we recommend building your skills and strength until you can comfortably climb 6a/5.10a ontop-rope without falling. That way, when you begin lead climbing on easier terrain, like 5a/5.7, 5b/5.8, or easier, you can confidently climb, knowing that you are sufficiently strong.

Practice Clipping a Quickdraw
For most people, the climbing movement portion of lead climbing comes naturally to them. However, the clipping of quickdraws consistently challenges budding lead climbers.
Therefore, we recommend practicing clipping quickdraws before you leave the ground on your first climb. You can practice with a single quickdraw and a shortened piece of climbing rope.
Over time, your clipping efficiency with both hands will improve exponentially.
Mock Lead and Belay
Becoming a lead climber does not have to be scary. If you are nervous about beginning to lead climb, then it’s best to take things slowly. The best way to accomplish that is with mock leads and belaying.
Mock leading is when you climb on two ropes – one rope is your primary top rope, and the other rope is your mock lead rope. As you climb upwards and receive a top-rope belay, you can also practice clipping quickdraws with your mock lead line.
Similarly, you can also mock lead belay. This technique requires three people– a lead climber, a mock lead belayer, and a top-rope belayer. As the lead climber ascends upwards on a lead rope, they are given a lead belay. Next to them, the third climber in the party provides a top-rope belay to back up the system.

Join a Lead Climbing and Belaying Course
Modern climbing gyms take lead climbing safety very seriously, and for a good reason. Leading is a dangerous activity that can lead to serious injury, or worse, if not correctly performed.
For that reason, most climbing gyms offer lead and belaying courses where you can learn to climb and belay safely. In these courses, you learn the basics of lead climbing and belaying– specifically, how to catch a falling climber.
So get out there and join a class or hire a guide! We have a good feeling you’ll love the freedom and excitement of climbing on the sharp end. Be safe!
References
Rock-Climbing Injuries in Yosemite National Park
Bowie et al. (1988)
Western Journal of Medicine
https://www.ncbi.nlm.nih.gov/pmc/articles/PMC1026367/